Posted by Natalie Sumbo on Aug 18, 2025
Tags: #Self-hosting #HomeLab
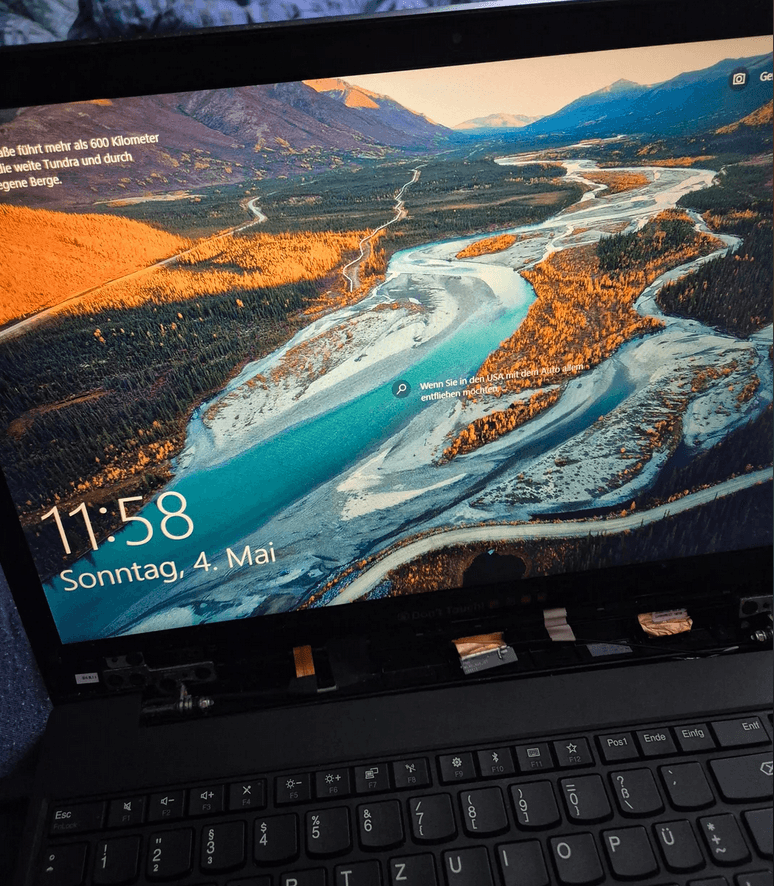
How a dropped ThinkPad became the heart of my personal cloud
Picture this: You're rushing to class, laptop bag in hand, when disaster strikes. One drop later, your ThinkPad E595 looks like it survived a small explosion. The front hinge area (or whatever it’s called) has been broken. Despite this, the laptop still works perfectly on the software side, but the hardware is in pretty bad shape.
That was my reality 3 years ago. After getting into the HomeLab rabbit hole I have decided to turn my laptop into my home server.
The Vision
I wanted something simple yet comprehensive:
- A central place for all my files and calendars
- Secure photo storage that actually respects my privacy
- A password manager I could trust
- Access from anywhere, not just my home network
Most importantly, I wanted to know exactly where my data lived and who had access to it.
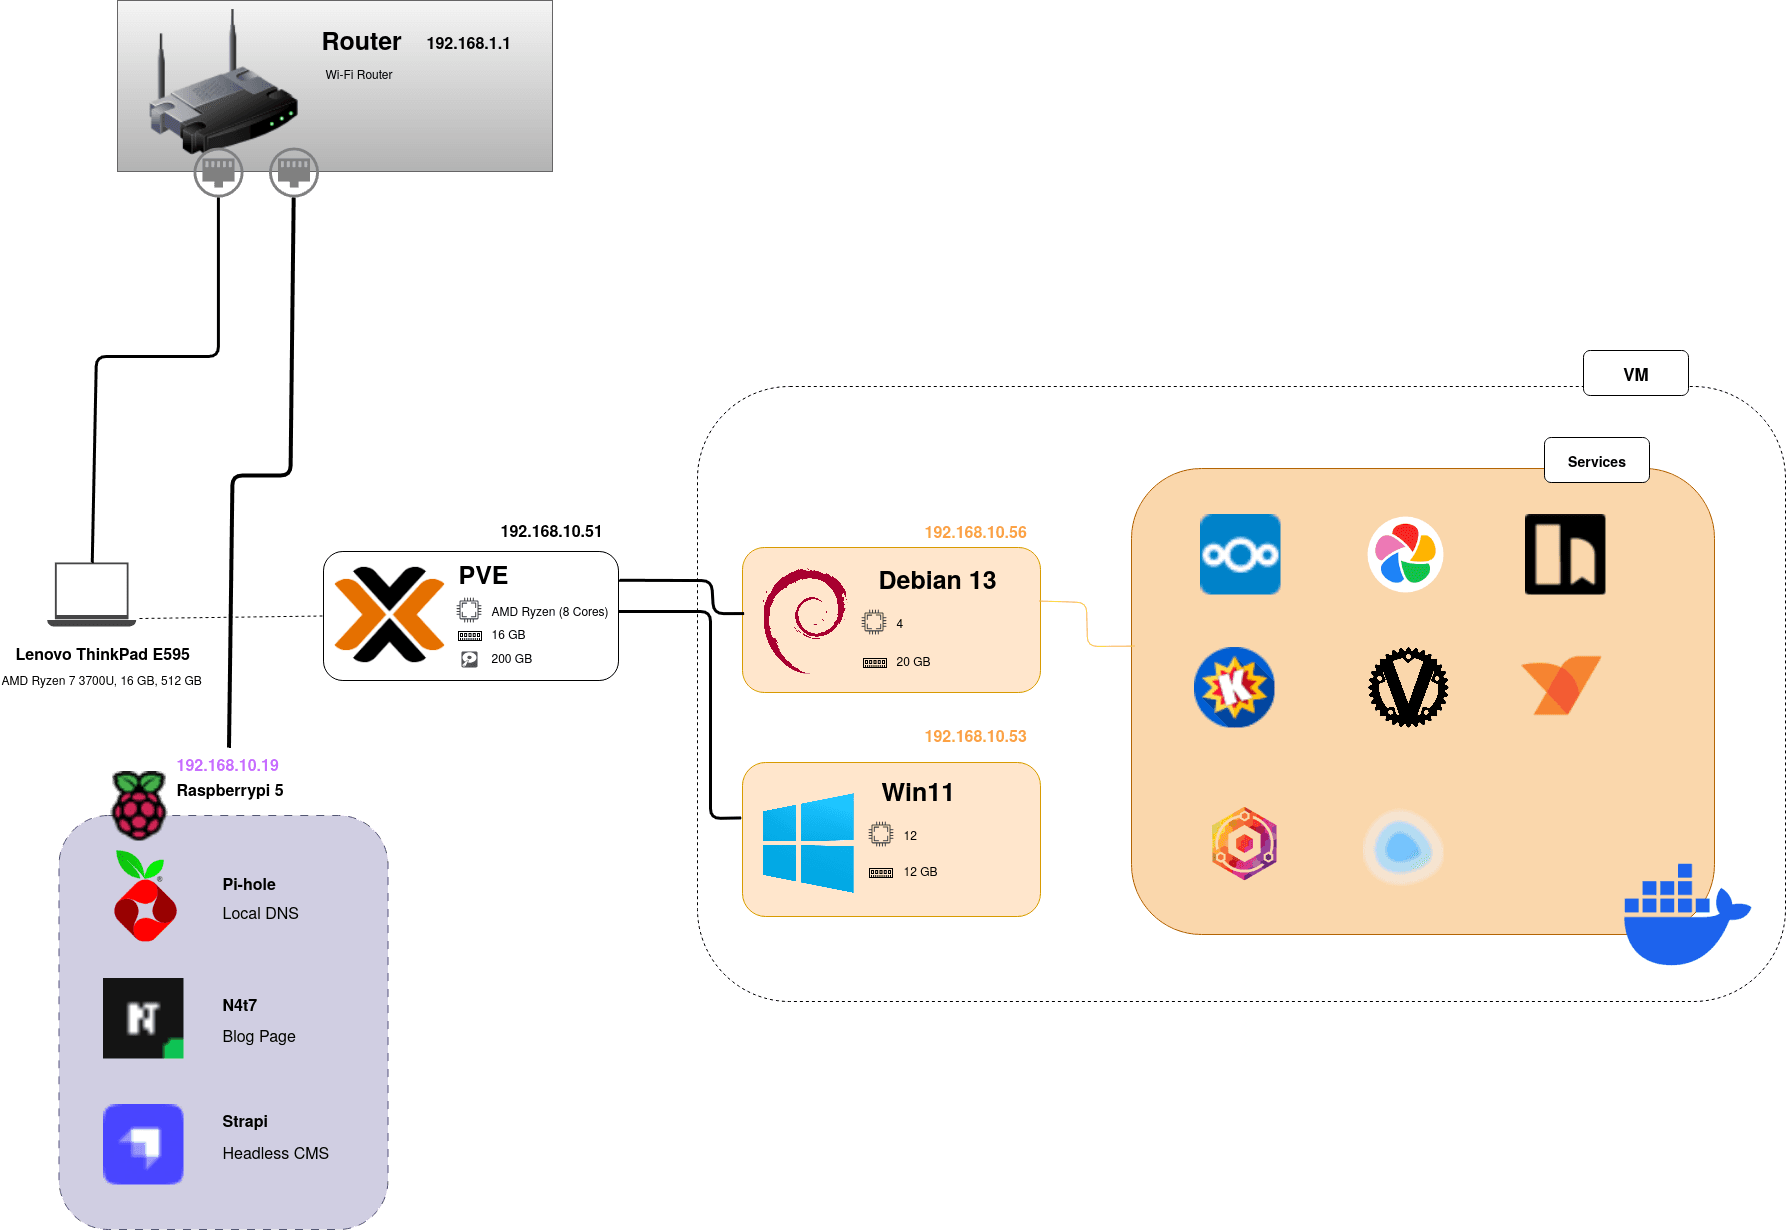
The Architecture
Phase 1: The Raspberry Pi Foundation
Before diving into the deep end, I started small. My Raspberry Pi 5 became the testing ground, running two essential services:
- Pi-hole: Network-wide ad blocking
- Personal blog: A simple static site to document my journey
Phase 2: The ThinkPad Transformation
The Hardware:
- ThinkPad E595 (AMD Ryzen 7 3700U, 16GB RAM, 512GB SSD)
- Perfectly functional despite the broken hardware
- Ethernet connection to my router for maximum speed
The Software Stack:
- Proxmox VE: The virtualization layer that makes everything possible
- Debian 13 VM: Clean, stable foundation for Docker containers
- Docker: Containerization for easy service management
The Installation Journey
Step 1: Choosing the Right OS
After researching various options, I landed on Proxmox. Why? Because it would let me run multiple virtual machines and containers, keeping services isolated while maximizing my hardware's potential. Plus, if I messed something up (and trust me, I did), I could just spin up a new VM without starting from scratch.
[Picture suggestion: Screenshot of Proxmox installation screen or the first boot]
The installation was straightforward:
- Download the Proxmox ISO
- Flash it to a USB drive using a tool like Balena Etcher
- Boot from USB (remember to change your boot order in BIOS)
- Follow the installation wizard
- Access your new server at
https://[your-ip]:8006
Step 2: Creating the Virtual Environment
Once Proxmox was up, I created my first VM running Debian 13. Why Debian? Rock-solid stability and excellent Docker support. This VM would become the workhorse running all my containerized services.
Docker Structure
Once my Debian VM was running smoothly, I organized everything using Docker containers. My directory structure keeps things clean and manageable:
/docker
├── /immich
├── /nextcloud
├── /vaultwarden
├── /nginx-proxy-manager
├── /komga
├── /karakeep
└── /strapi
Each service gets its own folder with a docker-compose.yml file and any necessary configuration files. This approach makes backups simple and keeps services isolated from each other.
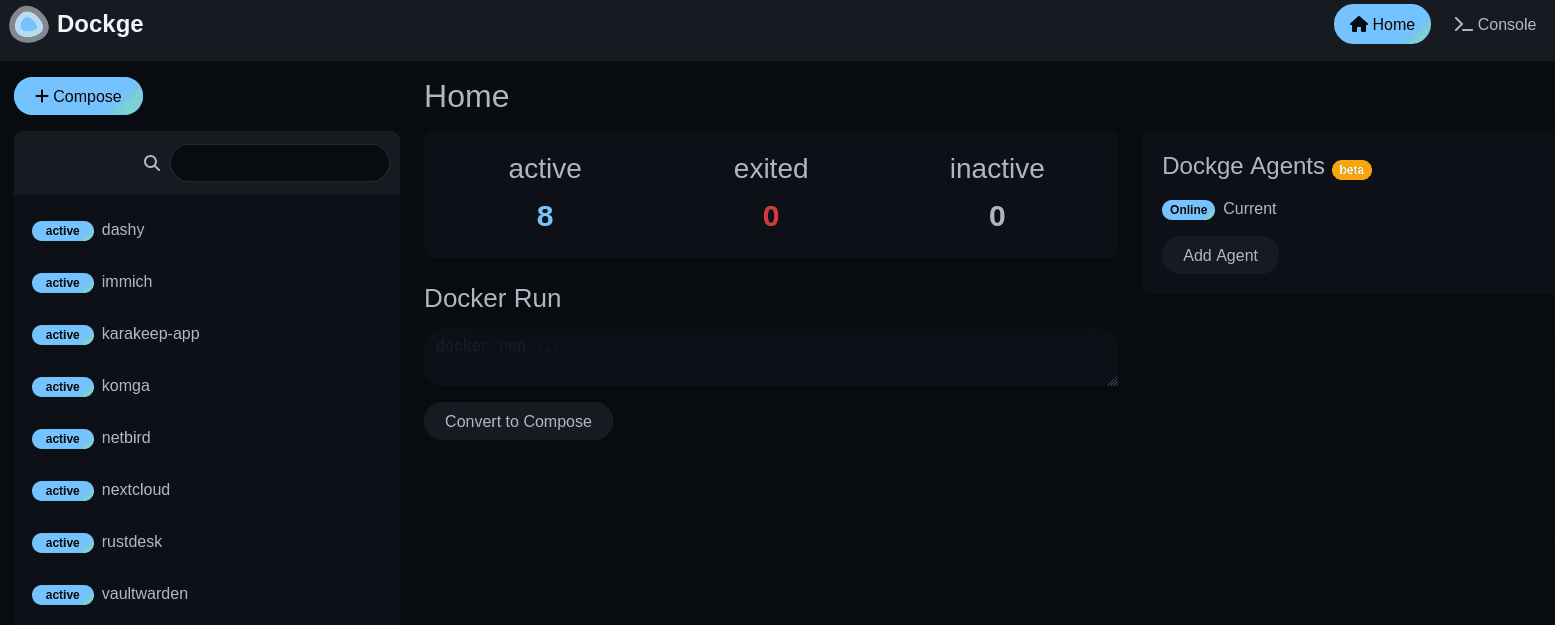
Container Management with Dockge
For managing all these containers, I installed Dockge - a sleek web UI for Docker Compose management. Unlike Portainer, Dockge focuses specifically on compose stacks, which is exactly what I needed.
Installation: I placed Dockge in /opt/dockge following their recommended setup:
# Create the directory
sudo mkdir -p /opt/dockge
cd /opt/dockge

# Download the compose file
sudo curl https://raw.githubusercontent.com/louislam/dockge/master/compose.yaml --output compose.yaml

# Start the service
sudo docker compose up -d
Here's my Dockge compose file that orchestrates everything:
services:
  dockge:
    image: louislam/dockge:1
    restart: unless-stopped
    ports:
      - 5001:5001
    volumes:
      - /var/run/docker.sock:/var/run/docker.sock
      - ./data:/app/data
      - /home/natalie/docker:/home/natalie/docker
    environment:
      - DOCKGE_STACKS_DIR=/home/natalie/docker
The Complete Service Lineup
Here's what's running in my personal cloud:
Storage & Media
- Immich: Google Photos replacement that actually respects privacy. Automatic photo backup from my phone with AI-powered face recognition and search.
- Nextcloud: The Swiss Army knife of cloud storage. Files, calendars, contacts, and notes all synced across devices.
- Komga: Beautiful comic and manga reader with progress tracking across devices.
- Karakeep: Lightweight bookmark manager for saving interesting links and articles.
Management & Infrastructure
- Proxmox: The virtualization foundation that makes everything possible.
- Pi-hole: Network-wide ad blocking that speeds up browsing for every device on my network.
- Nginx Proxy Manager: Clean web interface for managing reverse proxies and SSL certificates.
- Dockge: Docker Compose stack management with a beautiful, intuitive interface.
Content & Communication
- N4t7: My personal blog where I document projects like this one.
- Strapi: Headless CMS that powers my blog's content management.
Security & Access
- Vaultwarden: Self-hosted Bitwarden server for password management without monthly fees.
- Netbird: My self-hosted VPN solution for secure remote access.
Remote Access with Cloudflare
The final piece of the puzzle was secure remote access. Cloudflare Tunnels are a secure way to expose my services to the internet without opening any ports on my router or exposing my home IP address.
Benefits
- No port forwarding: Services reach the internet through encrypted tunnels
- DDoS protection: Cloudflare's network shields my home connection
- SSL termination: Automatic HTTPS certificates for all services
- Custom domains: Clean URLs like
immich.yourdomain.com - Access control: Built-in authentication and access policies
Setup process:
- Configure your domain's DNS through Cloudflare
- Install
cloudflareddaemon on your server - Create tunnels for each service through the Cloudflare dashboard
- Configure Nginx Proxy Manager to handle internal routing
- Set up access policies for sensitive services
Keeping Management Tools Private with Netbird
However, not everything should be accessible from the public internet. Critical infrastructure tools like Proxmox and Nginx Proxy Manager need an extra layer of security.
This approach gives me both options to publicly access my services for daily use through Cloudflare and to access administrative tools through Netbird.
I'll be covering the complete Netbird setup and configuration in a dedicated blog post soon.